


How to create routes with createBrowserRouter in React
Set up routes for components having same Header/Footer throughout the project or different Header/Footer for some section


Are you confused about how to create routes for different components in your React project using the most recommended createBrowserRouter?
Don't worry, you will get a clear understanding of it as I am going to explain it in this blog with images and codes for your better understanding. Here I am going to cover two situations.
The first one is creating routes when there is the same header/footer for every page throughout the website and the second one is when there are different headers/ footers or maybe some other designs for some of the pages of the website. We are gonna cover all of it...without further delay Let's get started...
Let's start from the start itself. To create routes, first quickly install react-router-dom by running the following command.
npm i react-router-dom
Creating routes when there is the same header/footer for every page throughout the website
For this scenario, suppose we have some components named Home, About, and Contact and there is a header like the below image where we can navigate to the About page and come back to this Home page.

Setting up the Routes in App.js file
Let's write code to create the above routes. First, we will create the routes in our App.js file using createBrowserRouter and RouterProvider. We have used path (the defined route, the URL to navigate from one page to another), element (the component which will be rendered when navigated following the route), errorElement (if none of the defined routes match the current URL then will be redirected to this error page), children (it is an array of nested routes or child routes basically a collection of all the components which will be present within the parent element component)
import { RouterProvider, createBrowserRouter } from "react-router-dom";
import ErrorPage from "./ErrorPage";
import About from "./About";
import Contact from "./Contact";
import MainPage from "./MainPage";
import Home from "./Home";


function App() {
  const router = createBrowserRouter([
    {
      path: "/",
      errorElement: <ErrorPage/>,
      element : <MainPage/>,
      children: [
        {
         path: '/',
         element: <Home/>,
        },
        {
          path: "about",
          element: <About/>,
          children: [
            {
              path: 'contact',
              element: <Contact/>,
            }
          ]
        },
      ]
    }
  ])
  return (
  <RouterProvider router={router}/>
  );
}

export default App;
Wrapping components with same Header component
In the above code <MainPage/> component will look like the below code snippet, where Outlet refers to all the children of <MainPage/> element.<Header1/> above the <Outlet/> shows that all the Outlets will have this Header common in them, so, we don't have to write this header code to individual child again and again.
import React from 'react'
import Header1 from './Header1'
import { Outlet } from 'react-router-dom'

export default function MainPage() {
  return (
    <div>
   <Header1/>
   <Outlet/>
   </div>
  )
}
Children within children and its use with example
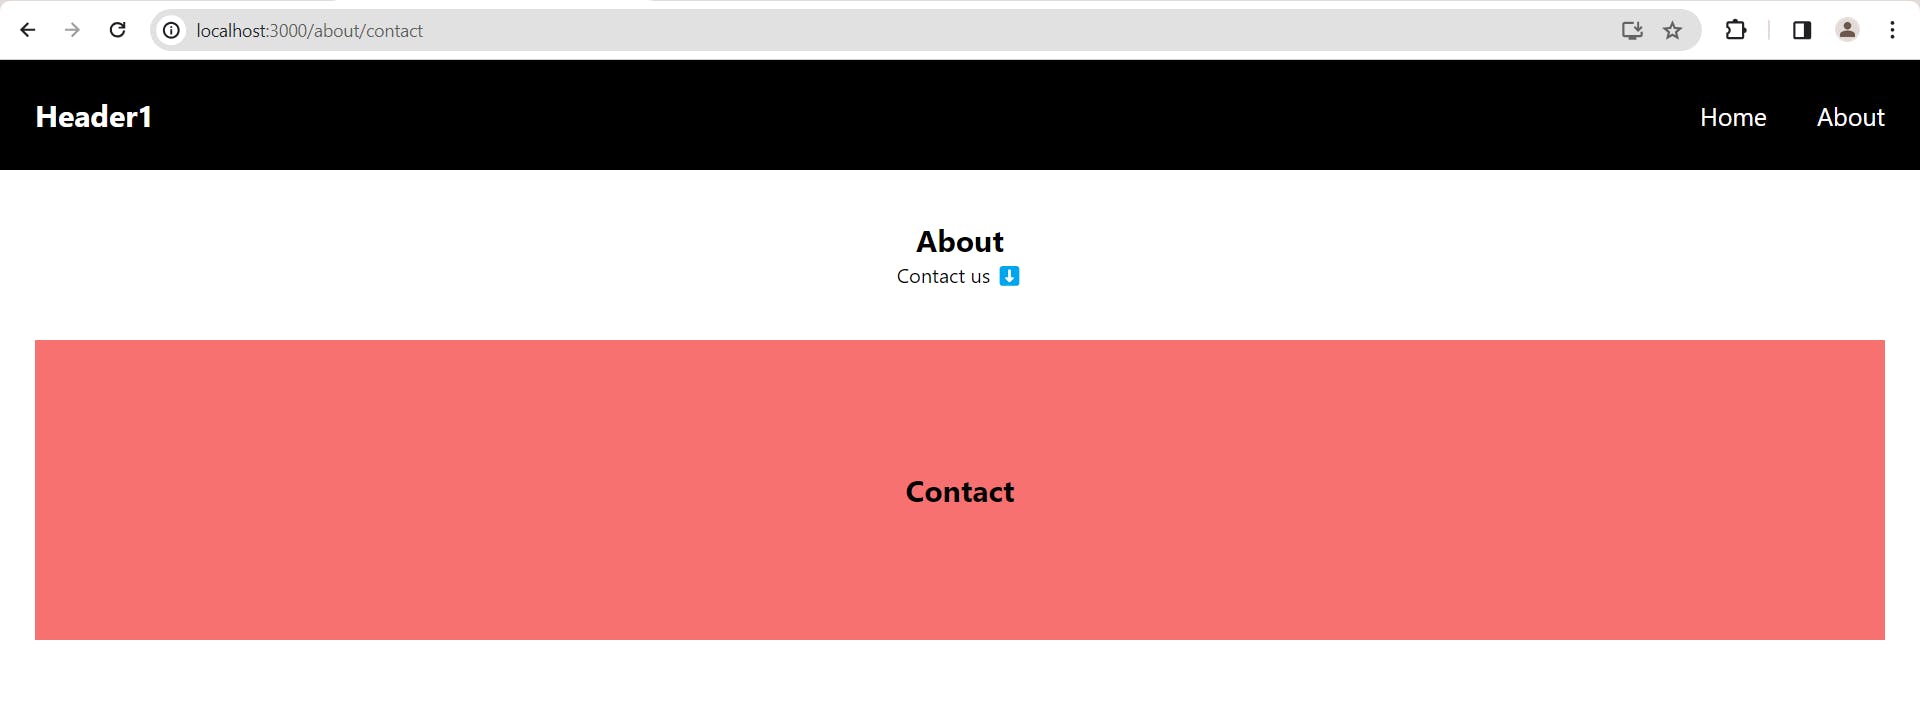
There can be some cases where within a specific page of the website (e.g. About page), we need to show a different component through navigation (e.g. Contact Page). Here I have already shown how to make routes for that as well in the App.js file (please scroll up to check the route for the <About/> component). Have a look at the URL in the picture as well http://localhost:3000/about/contact
As we can see in the App.js file, children within children (<About/> element's child is <Contact/>). We have used that to create the above design and, in that case, In the <About/> component, we will use <Outlet/> to show the <Contact/> page when clicking on Contact us (refer to the below Code snippet).
import { Link, Outlet } from 'react-router-dom';

export default function About() {
  return (
    <div className='flex flex-col items-center justify-center mt-10 pl-7 pr-7'>
    <p className='text-2xl font-bold'>About</p>
    <p><Link to="contact">Contact us ⬇️</Link></p>
    <Outlet/>
    </div>
  )
}
Now here is a catch... If you notice the App.js file carefully, for the element <About/>, the path is "about" and for <Contact/>, the path is "contact". Now if you give the path as "/about" for <About/> component then you must give the path for <Contact/> as "/about/contact" otherwise you may encounter an error saying Absolute route path "/contact" nested under the path "/about" is not valid. An absolute child route path must start with the combined path of all its parent routes.
Dynamic Routing with example
Now there can be a scenario where we have a product page, on click of a product it will navigate to that specific product's details page. As in this case, individual product's id will be different for different products, so we will have to define dynamic routing. To do that we can add another object in the children array of <MainPage/> element like the one below
      {
         path: "/productdetails/:id",
         element: <ProductDetail/>
        },
During navigation from the product's page to the individual product details page, we will dynamically give that specific clicked product's ID like this in the Link tag.
<Link to={"/productdetails/" + item.id} key={item?.id} >
Creating routes when there are different headers/ footers or some other designs for some of the pages of the website
Now as we have already covered the First scenario where all components have the same header throughout the website, let's create routes for the Second scenario where some pages of this website have a different Header. To do so let's add SideMainPage in Header1 (refer to the below image) which will lead us to a section of the website which has a different header, not <Header1/>

Setting up the Routes in App.js file
Let's modify our App.js a bit to implement the above. We will add another object with the path: "/sidemain" and element: <SideMain/> and its children array. In the below code snippet, you can notice that I have defined the path for the <About/> component twice in App.js. This way we can use a single component for Both Routes. We will understand that with an example in the later part of this blog.
 const router = createBrowserRouter([
    {
      path: "/",
      errorElement: <ErrorPage/>,
      element : <MainPage/>,
      children: [
        {
         path: '/',
         element: <Home/>,
        },
        {
         path: "/productdetails/:id",
         element: <ProductDetail/>
        },
        {
          path: "about",
          element: <About/>,
          children: [
            {
              path: 'contact',
              element: <Contact/>,
            }
          ]
        },
      ]
    },
    {
      path: "/sidemain",
      element: <SideMain/>,
      errorElement: <ErrorPage/>,
      children: [
        {
          path:"/sidemain",
          element: <Home2/>
        },
        {
          path:"/sidemain/sideabout",
          element: <SideAbout/>,
        },
        {
          path:"/sidemain/about",
          element: <About/>,
          children: [
            {
              path: '/sidemain/about/contact',
              element: <Contact/>,
            }
          ]
        },
      ]
    }
  ])
The <SideMain/> component looks like the below code snippet where its Outlet has a different header named <Header2/>
import { Outlet } from 'react-router-dom';
import Header2 from './Header2';

export default function SideMain() {
  return (
      <div>
        <Header2 />
        <Outlet />
      </div>
  )
}
Explore the Component with different Header in depth.
We navigate to this section (<Sidemain/>) of our project by clicking on SideMainPage in <Header1/>. Let's have a look at how this new Header and pages look like when we click on SideMainPage.

In Header2:
MainHome (<Link to="/">) will lead us to the Main Page having Header1,
MainAbout (<Link to="/about">) will again take us to the Main Page's About component having Header1
SideAbout (<Link to="/sidemain/about">) will show the About component with Header2 only like the below Image. This way we can use the same Component in two different scenarios.

Hope you enjoyed reading the blog and the above explanation makes it easy for you to create routes for your React Project. Happy Coding 😇.