How to Clone a Git Repo, Publish, Push code to Git with VS code
Learn to Clone a Git repository, publish, commit changes, and push code into the desired Git repository with VS Code

If you are a developer then you are well aware of the importance of GitHub and how common it is to publish, commit, push your code to Git and clone a repository to use it locally. Do you know how to do the above using VS code only? If your answer is No, don't worry, this blog is for you 😊. Read till the end to learn about an important point to configure Git in VS Code. Now without wasting much time, let's get started.
Cloning a Git Repository
Copy the Git repo link from the Git
Suppose you want to clone a repo from another person's git profile (in that case you can clone only if the repo is public) or from your git repo (you can clone both private and public repos). Follow the steps
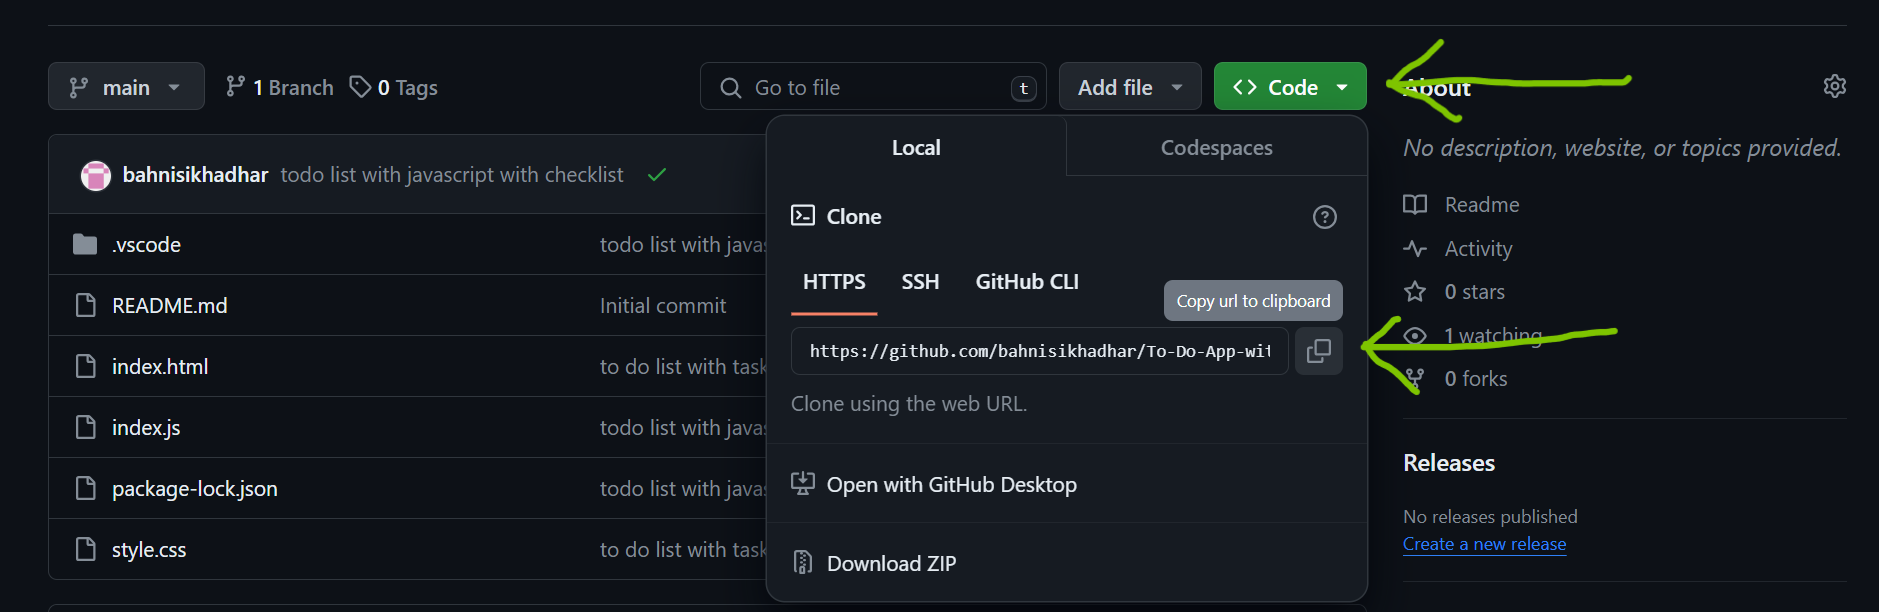
Go to the specific repository you want to clone
Click on the Code button as shown in the image below
Now, copy the URL as shown with the arrow
Use VS Code to clone the Repo locally
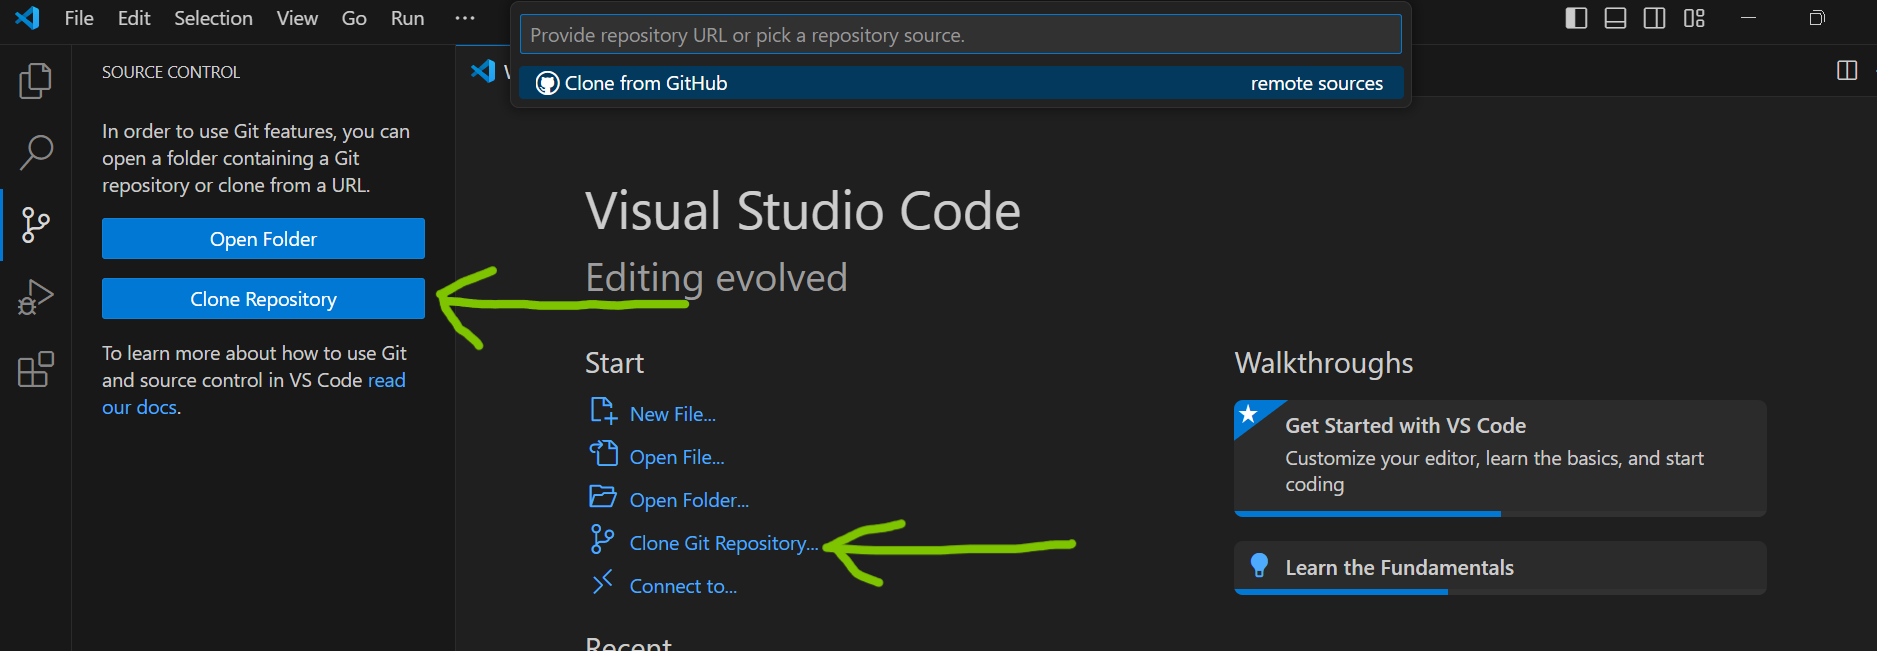
Open your VS Code
You can find the option Clone Repository or Clone Git Repository, click on it
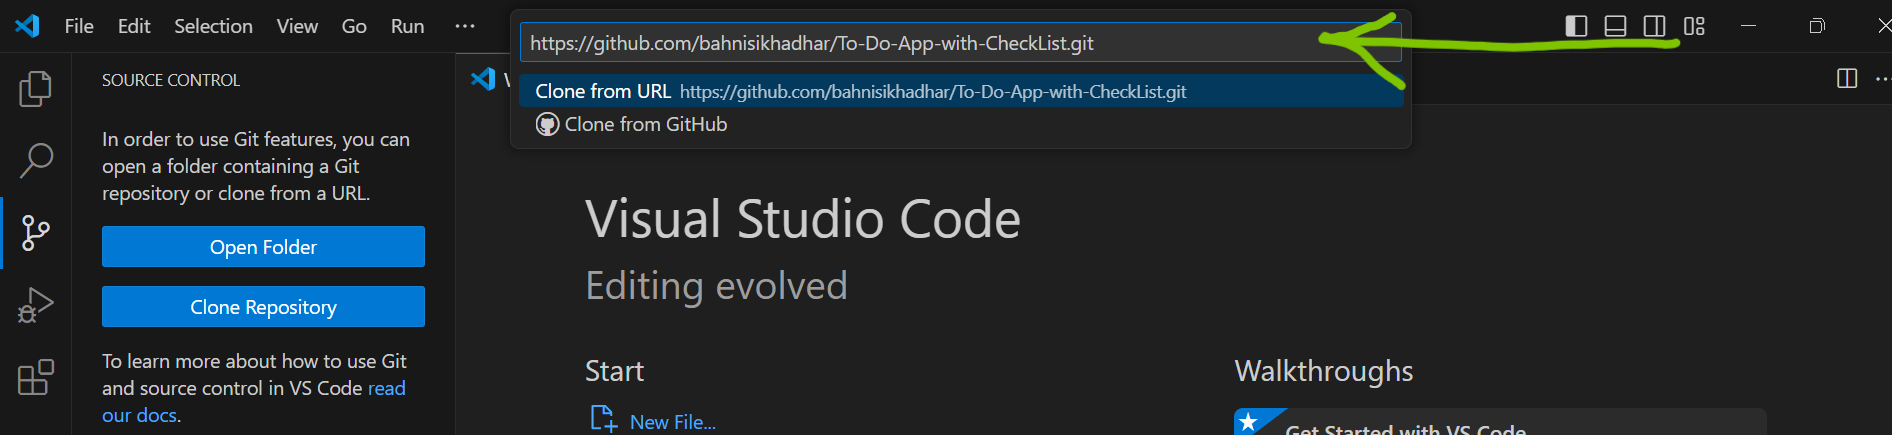
- Now paste the copied URL in the input box shown by the arrow and press Enter
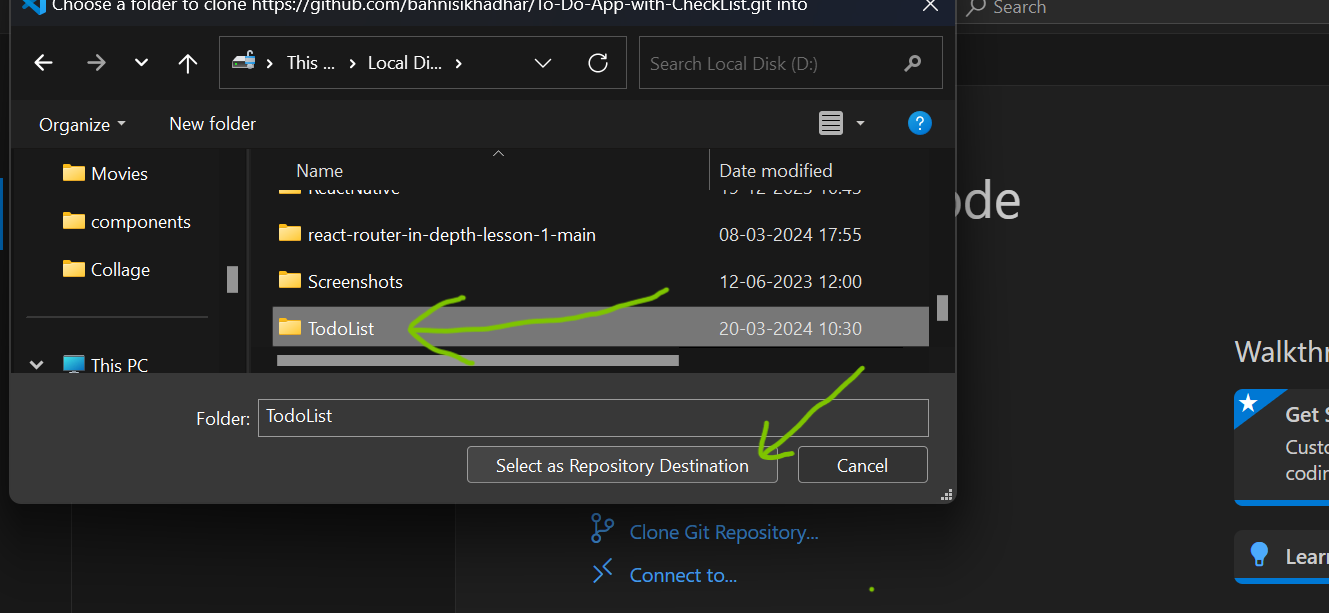
- Once you press Enter, you need to choose a place to create a new folder where this cloned repo will be saved. after choosing a place, click on New folder (marked by an arrow in below image)
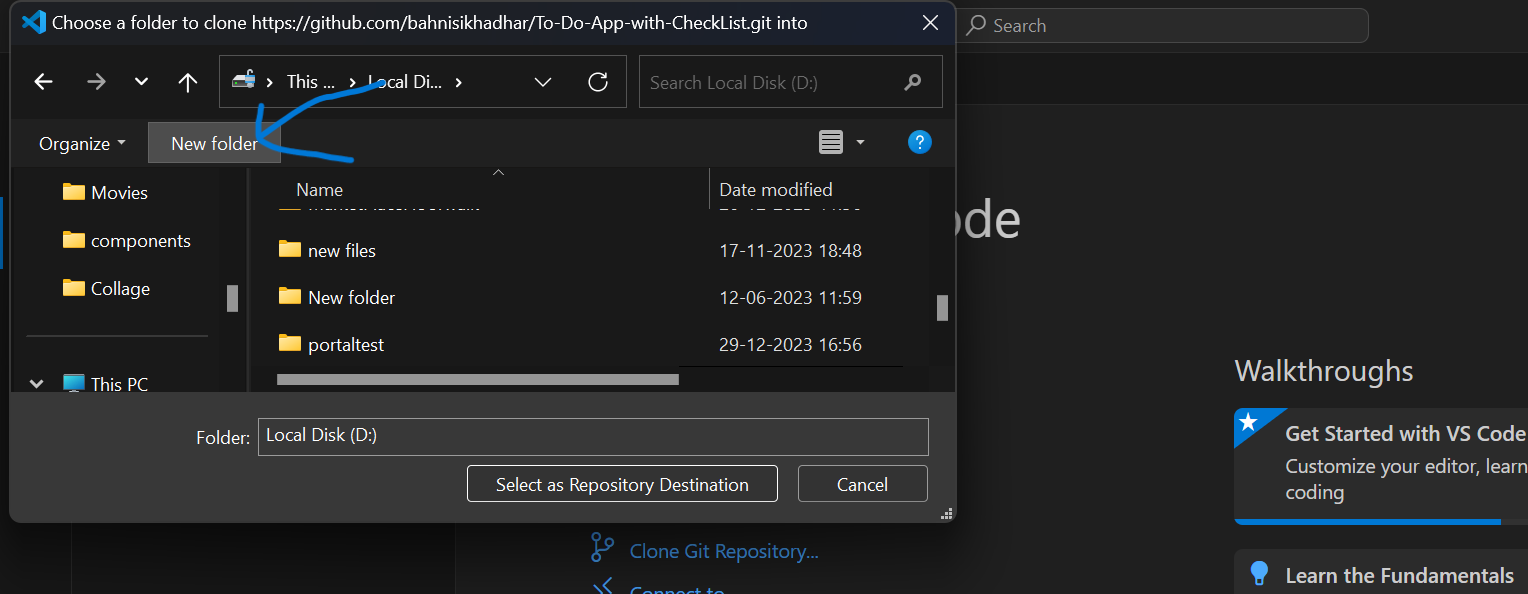
- Name your folder and click on Select as Repository Destination
- Now you will be redirected to VS Code, Click on Open
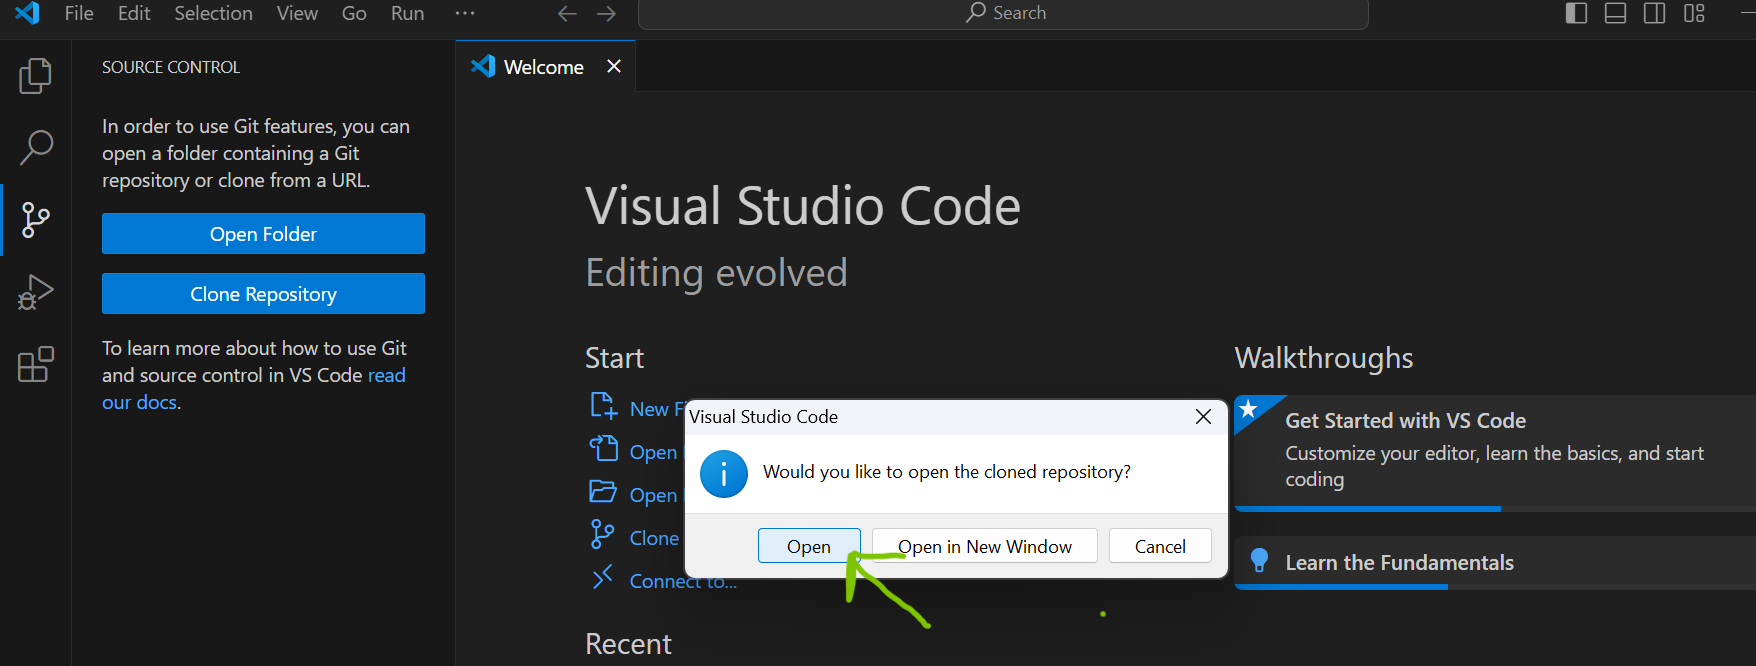
See!!! You already have the code locally as shown below. 😊
Publish a branch in your Git Repository using VS Code
As we have already discussed how to clone a repo easily, Now let's quickly learn how to publish a branch in Git using VS code. Follow the below steps
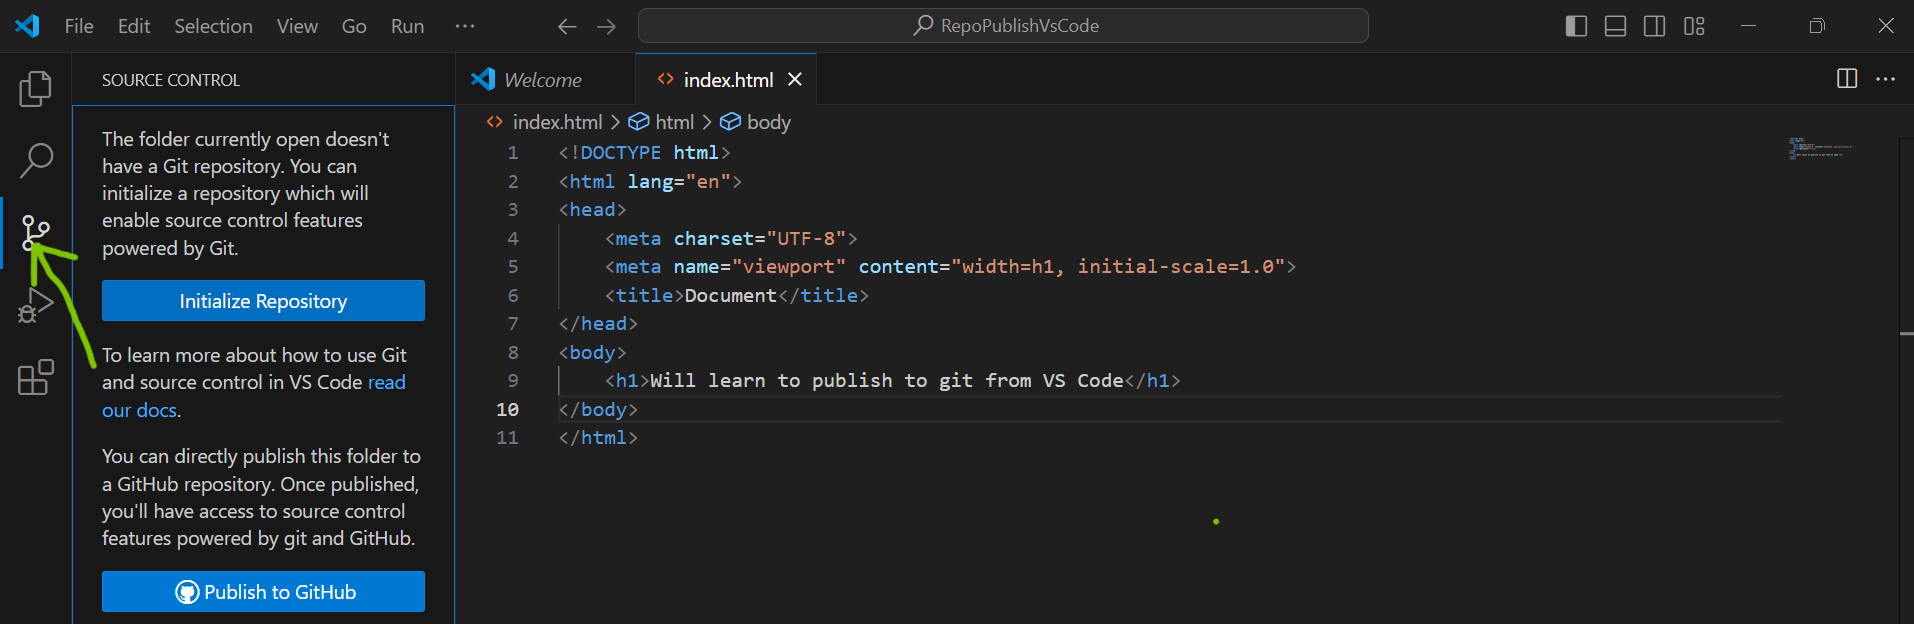
- Click on the Source control icon at the left side of the VS code (green arrow in the image), you will see two options: Initialize Repository and Publish to GitHub
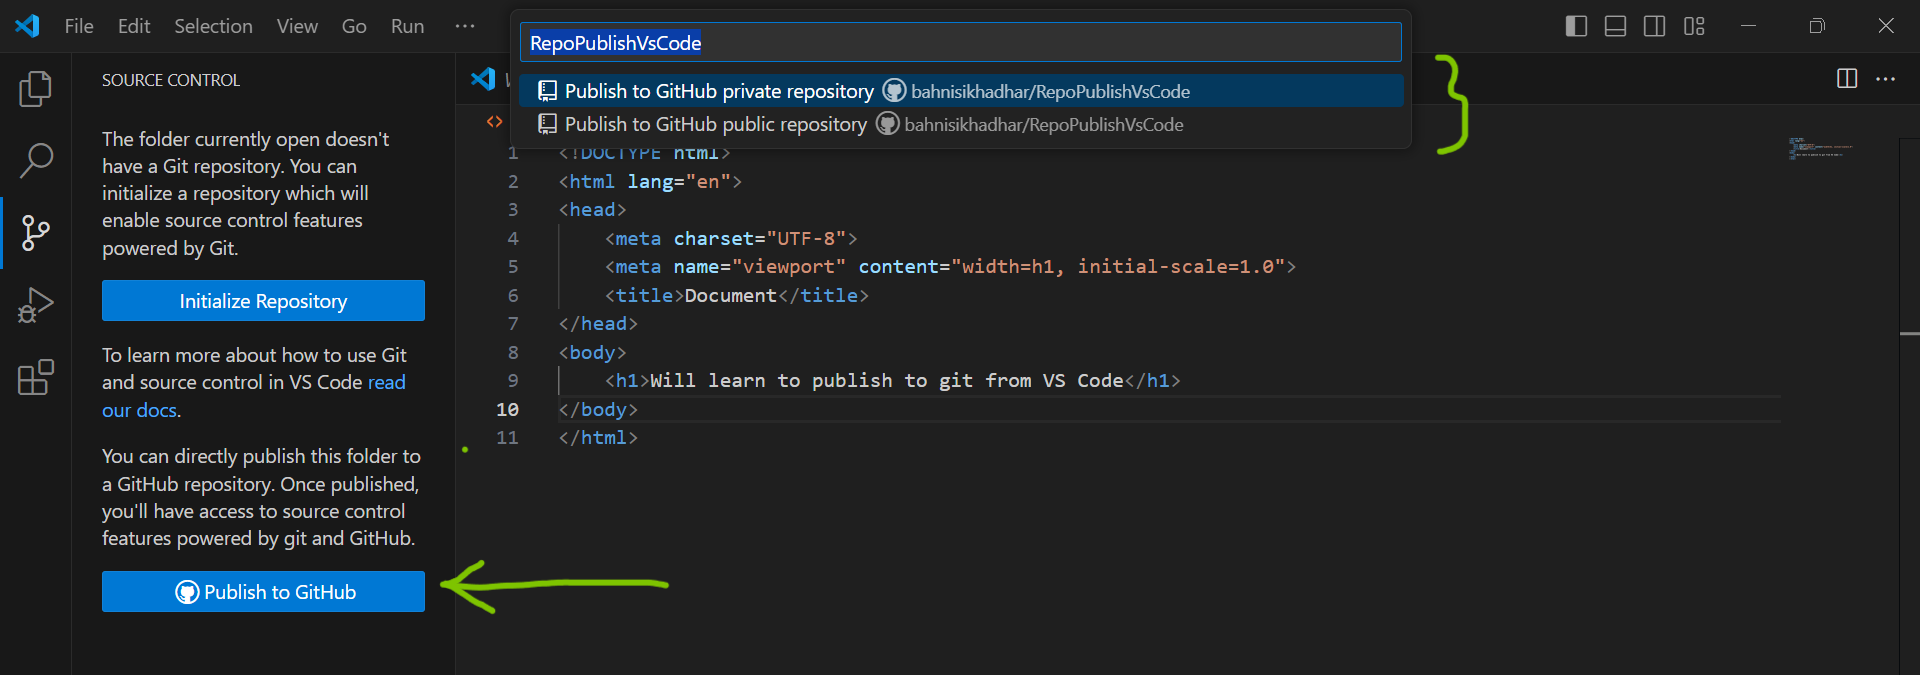
Click on Publish to GitHub and you will see something like the image below (marked by } ) at the top. You can change the name of your repository or keep it as it is (here it is RepoPublishVsCode), this will be the repository name in your GitHub.
The dropdown shows two options: Publish to GitHub private repository & Publish to GitHub public repository. Choose whatever you want it to be, if you choose it to be public then it will be visible to anyone and if you choose private then it will be only visible to you
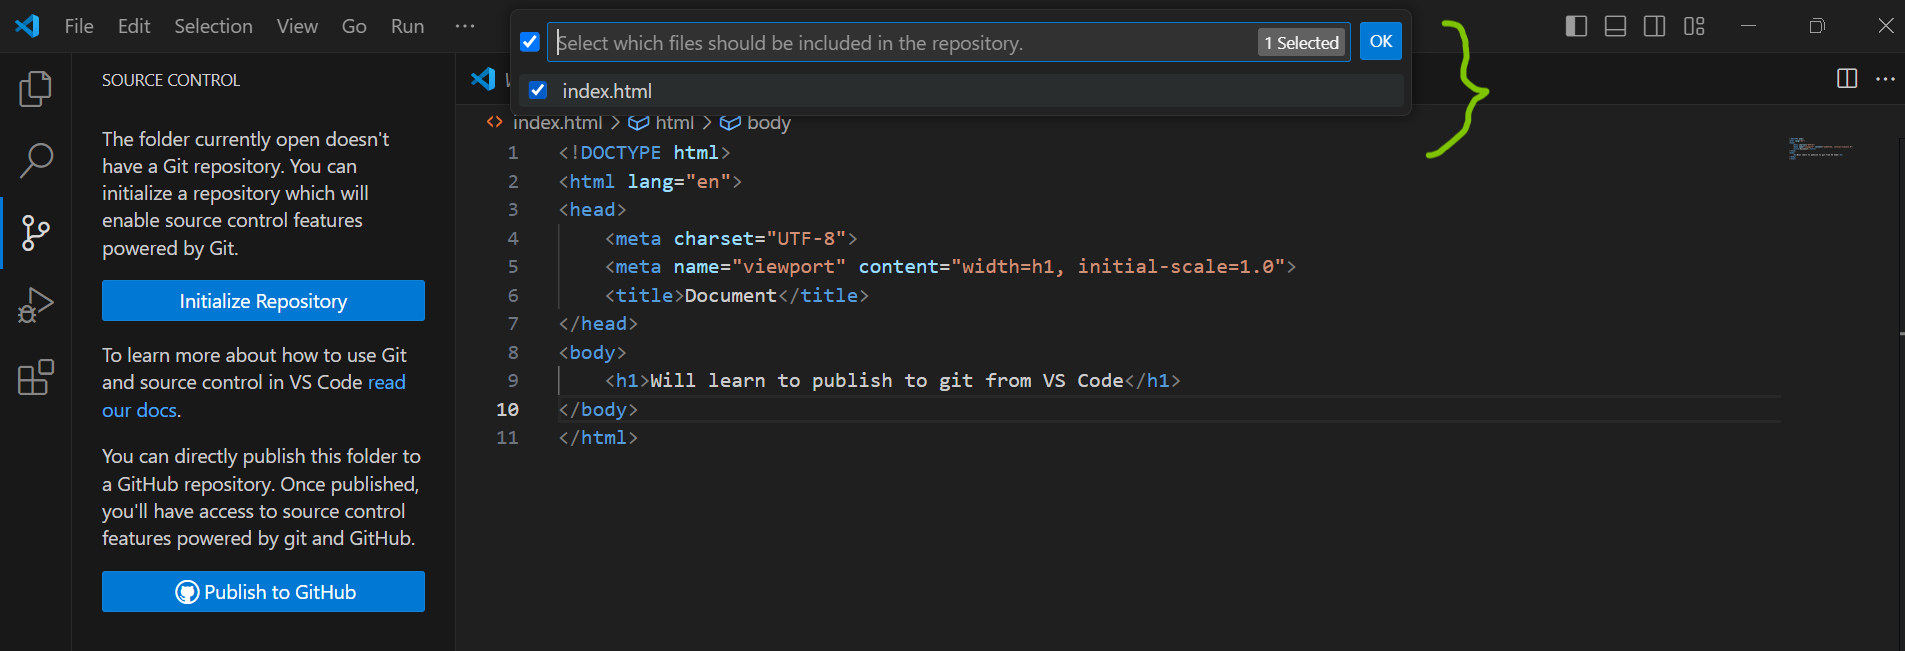
- Once you have done the above, you will get another dropdown of the files present in your project, deselect a file if you don't want to push that code in GitHub and click on OK and your code will be published in your GitHub profile 😊
Push code to your existing Git repository using VS Code
Suppose you have made some changes locally and want to push those changes to your existing Git Repository, you can do that using Vs Code only. Let's learn that too...
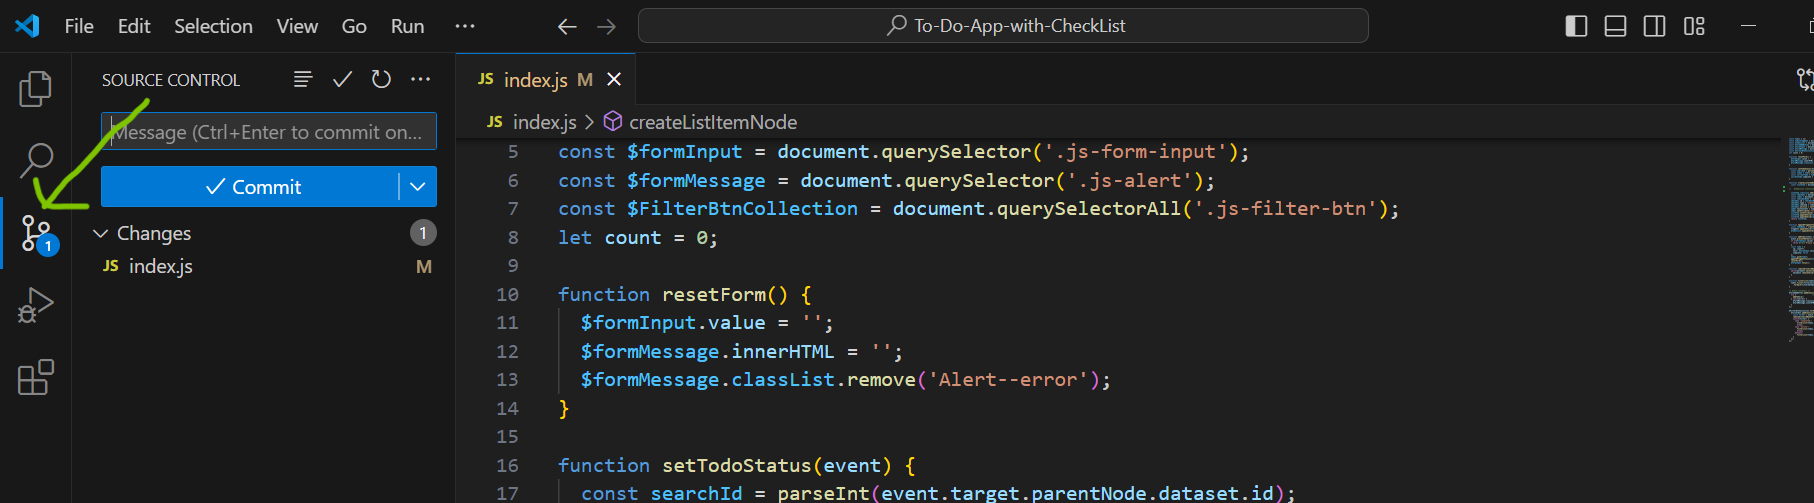
- When there are some changes made then you can see the number of changes shown below in the source control icon, now click on the icon
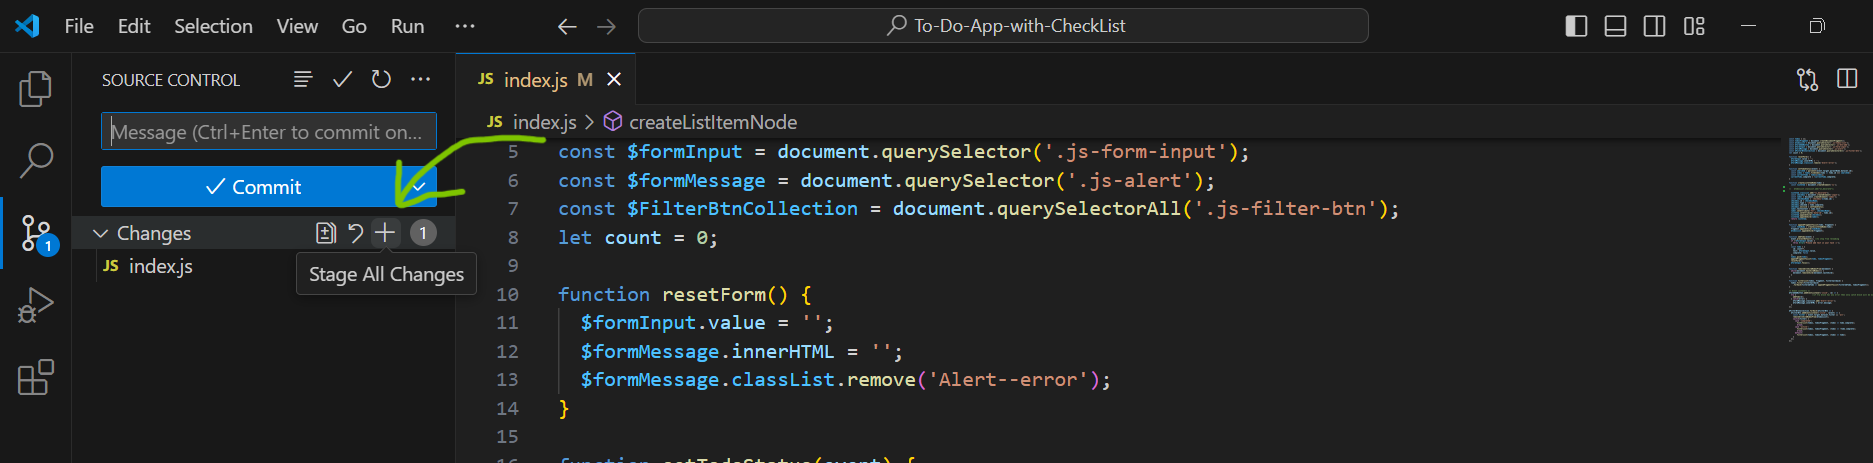
Now click on + and stage all changes (shown in the below image using the green arrow), write a commit message (write a meaningful commit message describing what changes have been made) at the box above the Commit button, then, click on the Commit button
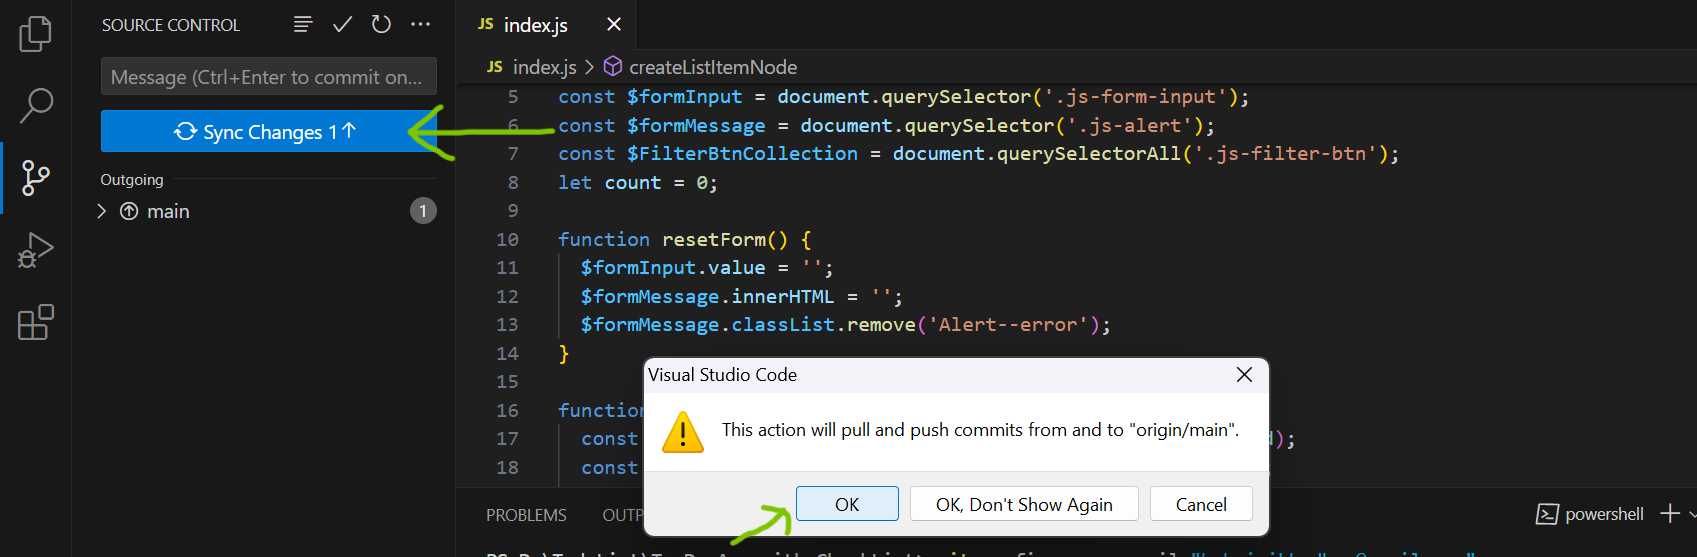
- Once a message is committed, click on Sync Changes, you will see a pop-up, and click on OK, this will push commits to the main branch of your existing Git repository (You can choose the OK, Don't Show Again button too)
An important side note to configure Git in VS Code
- When trying to publish a branch in Git or using VS code for the first time to interact with Git, you may encounter something like the image below.
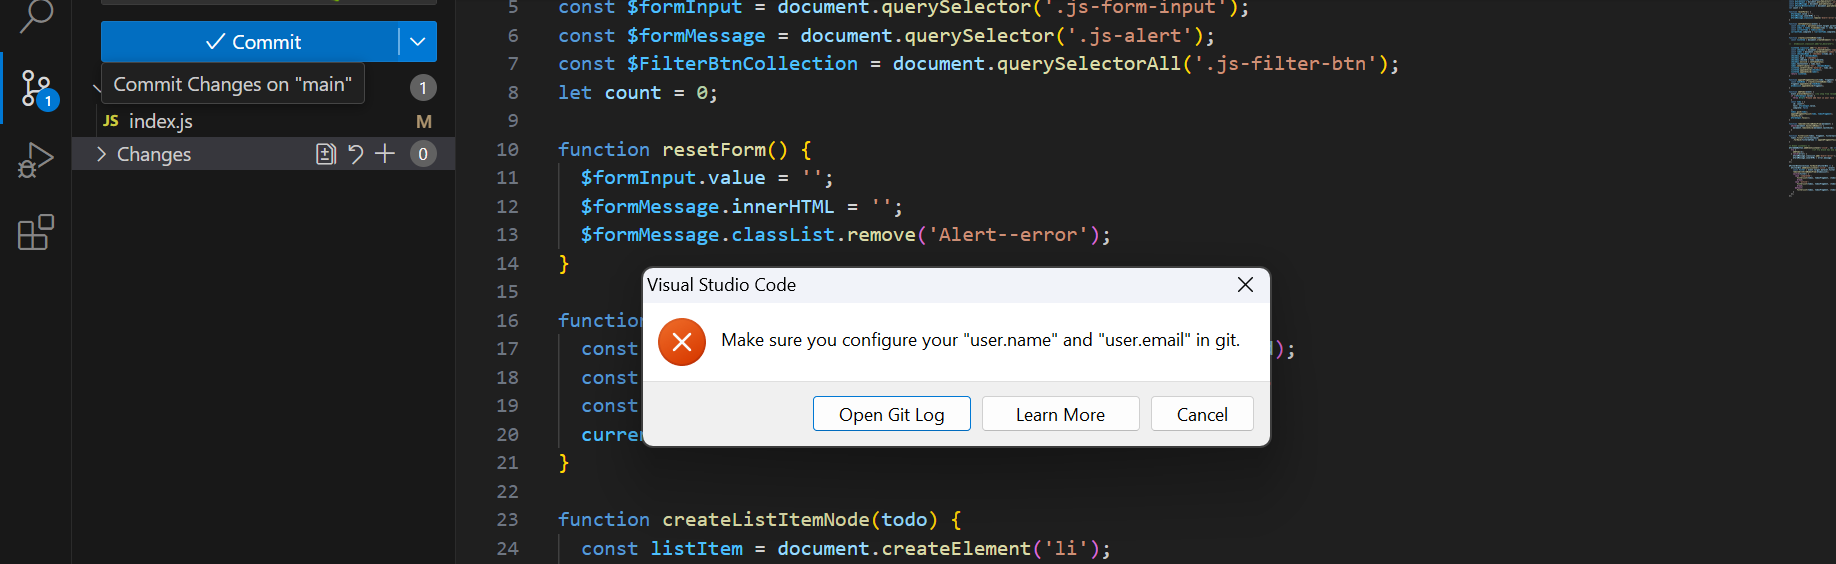
Click on Open Git Log and you will see the below details guiding you on what to do next
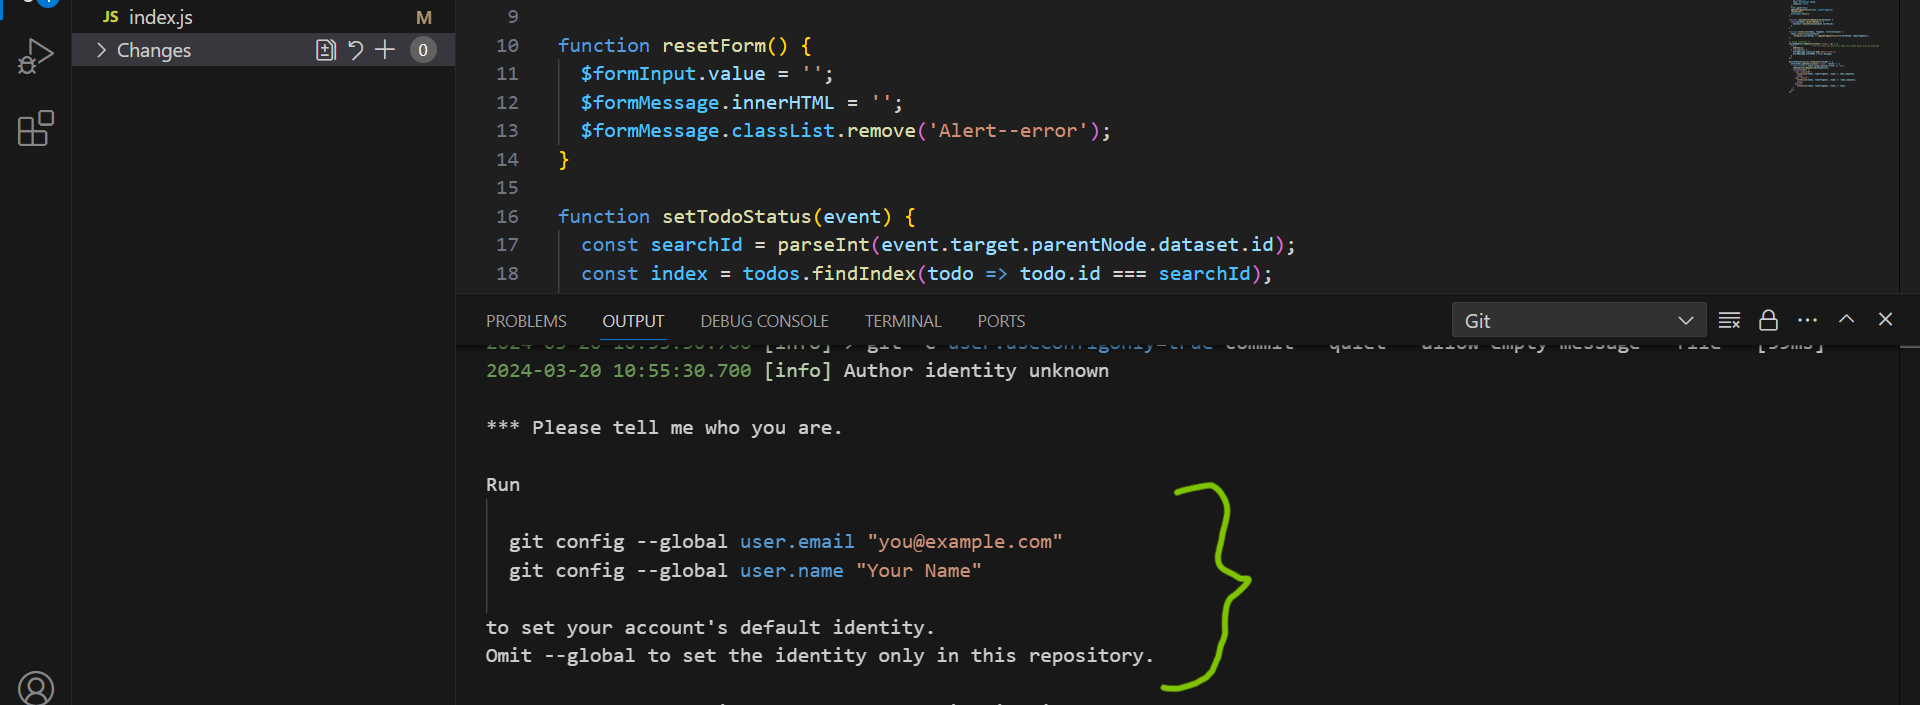
- Now go to the Terminal and run these two commands (use your own GitHub credentials like username and email). You can omit --global from the commands to set the identity only in this repository.
git config --global user.email "your GitHub's email id"
git config --global user.name "your GitHub's username"
By following the above, you can now follow the normal methods to interact with GitHub using VS Code as mentioned earlier in this blog. Wasn't it easy and fun?! 😊
I hope you enjoyed reading it and the above explanation will help you to clone, publish, and push to GitHub more easily using VS Code 😇.


